Oyster Mushroom Grow Kit Instructions
Step One
Place your kit box in a cool area away from direct sunlight, but not somewhere dark. An area that gets fresh air, but without strong breeze (like a kitchen countertop) would be ideal. You should be looking into the kit box from the top (the side with the shipping label).
Step Two
You should see a plastic-lined substrate block in the box. Leave the block in the box and cut a Z or an X shape into top of the block with a sharp, clean blade. Your knife can cut into the substrate but try not to go deeper than 1/4 inch.
Step Three
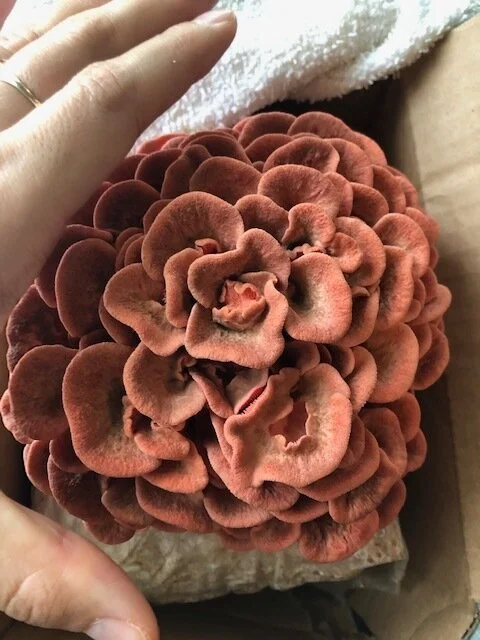
Spray the slits you made with clean, fresh, water 3-5 times a day. Keep doing so until you see small white "pins" start to form where you made your slits. As in the photo to the left, if you have a pink oyster mushroom kit, the pins might be pink from the start.
Optional: Raise the flaps of the box into their open position (you can tape them together). This will create a “well” that retains humidity in the space directly above the block (refer to the photo in step one).
Step Four
Once the pins (should like miniature mushrooms) begin to grow, you can fold down the flaps of the box down onto the outer part of the box so that the top of the block may receive fresh air. Now, only spray water around the pins, never letting too much water directly sit on the young mushrooms.
Grower’s Tip: Water sitting directly on your baby mushrooms along with warm temperatures will increase the likelihood of the mushrooms getting contaminated and dying. If this does happen (you will see the pins exuding orange-brown drops of liquid), simply pick away the mushrooms, put the block somewhere with better airflow, and start over from step 3.
Dry mushrooms/pins?: If you are finding that your mushrooms are drying out at any stage, you can make a humidity tent for your kit. All you have to do is take a plastic bag (clear plastic is a good option as it still let's light through), poke several 1/2” holes in it, and cover the kit with the bag. Then when you spray, you do so onto the inner lining of the bag to maintain higher humidity within the "tent". If you are finding that your mushrooms are elongating their stems, that means they need more fresh air. In this case, lift the bag up a couple of times a day to give the mushroom’s some circulation.
Step Five
Each day the pins will grow, nearly doubling in size. After a few days, harvest your mushrooms before the cap margins turn completely flat for oyster mushrooms.
After you harvest you can spray the same slit additionally to encourage a second (or eventually third) flush, which will be smaller than the previous flush. You may choose to remove the block from the box, flip it over, place it back in the box, and create a new slit to encourage new growth.
Even if nothing is growing after your first harvest and you decide to stop spraying, do not throw out the block because mushrooms might pop up when you least expect it! Check back every couple of days.


